Do you want to document your Play application with Swagger? You may have decided Swagger is the right choice for you but give it a try and you’ll face with poor documentation and issues with different Play versions. This post will go through setting up Swagger for a play application from scratch. If you’d rather cut to the chase and get started with a working setup then you can clone swagger-tutorial and update the sample-swagger project to your needs.
Background
The core of swagger is a specification on how to describe REST API. It specifies how an API should be described using the JSON format. Built around this is Swagger UI that can parse such a specification and provide a good presentation. It also allows for test calls within the UI which is very useful for development.
We will do the following
- Create a bare Play app
- Add a simple REST endpoint
- Add Swagger annotation to the endpoint
- Add swagger json endpoint
- Setup Swagger UI
- Use Swagger UI to make a test call
This post is tested on Play version 2.5.x.
Create a bare Play app
Let’s start off with a working Play application. If you already have a working Play application you can use that and skip to the next section. Bear in mind this post is tested on Play 2.5.x.
If you want to start off with a sample Play project, clone my repo,
git clone git@github.com:tilayealemu/swagger-tutorial
There are two projects.
sample-play: a bare Play appplication
sample-swagger: a Play application with one end point and a swagger doc for it. It has all the changes discussed in this post applied to it.
Build and run the project. You should be able see the root page like so.
Add a simple REST endpoint
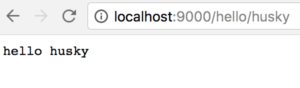
Let’s add a simple REST endpoint. We create a “hello” service that takes a name and responds “Hello <name>”
If you cloned the sample-play project add this to the HomeController (if you have your own controller then use that).
def sayHello(name: String) = Action {
  Ok(s"hello $name")
}
Then define the endpoint in your routes file.
GET /hello/:name controllers.HomeController.sayHello(name:String)
Now call the endpoint.
We are now ready to move to Swagger.
Add swagger dependencies to project
Before adding swagger annotation, add this dependency.
libraryDependencies += "io.swagger" %% "swagger-play2" % "1.5.3"
Then go to your controller, such as HomeController, and import some Swagger dependencies.
import io.swagger.annotations.{Api, ApiParam, ApiResponse, ApiResponses}
import play.api.mvc.{Action, Controller}
Annotate the controller class with @Api, and annotate the method too:
@Api
class HomeController extends Controller {

  @ApiResponses(Array(
    new ApiResponse(code = 400, message = "Invalid name supplied"),
    new ApiResponse(code = 404, message = "Name not found")))
  def sayHello(@ApiParam(value = "Name to say hello") name: String) = Action {
    Ok(s"hello $name")
  }
}
Build your code to ensure there are no compilation problems. We can now generate swagger.json that will contain this annotation.
Add swagger json endpoint
Go to application.conf and add this to enable Swagger
play.modules.enabled += "play.modules.swagger.SwaggerModule"
Then And in routes file add swagger.json. This will list resources in your service.
GET /swagger.json controllers.ApiHelpController.getResources
Then when you access http://localhost:9000/swagger.json you will get the specification for your endpoint.
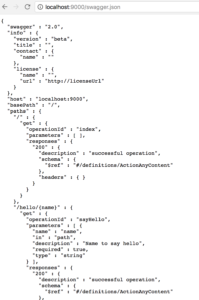
This is the core of what Swagger is. Next up is to use Swagger UI for a pretty view of this specification.
Setup Swagger UI
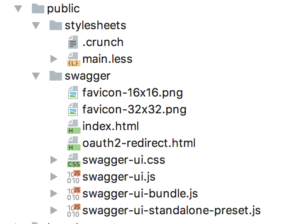
Copy Swagger UI files from the main github repo to your project. You only need the dist directory.
git clone git@github.com:swagger-api/swagger-ui
mkdir swagger-tutorial/sample-play/public/swagger
cp -R swagger-ui/dist/* swagger-tutorial/sample-play/public/swagger
Then update your route file. We will serve swagger under /docs/.
GET        /docs/               controllers.Assets.at(path="/public/swagger",file="index.html")
GET        /docs/*file          controllers.Assets.at(path="/public/swagger",file)
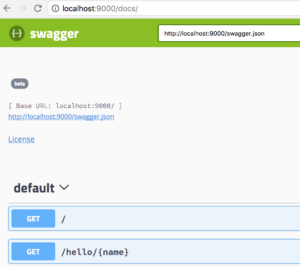
You can go ahead and visit localhost:9000/docs/ but what you will see is a documentation for a sample pet store REST API. Let’s update Swagger UI to use our swagger.json instead. Go to swagger/dist/index.html and change the pet store URL:
url: "http://localhost:9000/swagger.json"
You should now see your service listed.
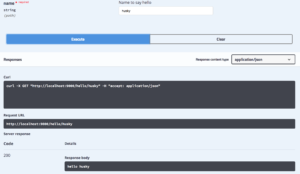
Use Swagger UI to make a test call
Click on the /hello/{name} endpoint. Click “Try it out”, type a name and click execute. You should get a response and 200 response code.
That’s it! You can head over to swagger annotations for more details on annotating services. Remember, if it doesn’t work for you, simply take sample-swagger and change it as you wish.
All comments welcome.